- 15.3.2 Service Manager Installation
- 15.3.2.1 Service Manager Installation Common Parameters
- 15.3.2.2 Service Manager Installation on Windows
- 15.3.2.3 Service Manager Installation on Mac OS X
- 15.3.2.4 Service Manager Installation on Unix
- 15.3.2.5 Starting/Stopping the MySQL Enterprise Monitor Service on Windows
- 15.3.2.6 Starting/Stopping the MySQL Enterprise Monitor Service on Unix and Mac OS X
- 15.3.2.7 MySQL Enterprise Service Manager Configuration Settings and Advisor Installation
On Windows the installation modes are win32 and
unattended only. unattended
mode is especially useful if you are doing multiple installations.
For more information on this topic see
Section 15.3.4, “Unattended Installation”.
Note
In order to install the Service Manager as a Windows service, you must do the installation as a privileged user.
On Windows Vista, if user account control is on, an operating system dialog box requests confirmation of the installation.
To install the Service Manager on Windows, find the executable
file named
mysqlmonitor-
(where version-windows-installer.exeversion represents the
three-part version number).
-
Double click on the MySQL Monitor installer. You should be presented with the Language Selection prompt. Select the language to use for the installer and then click OK.
With the installation language selected, the remainder of the installation sets up the installation location and the main configuration parameters required by MySQL Enterprise Service Manager. Click Next to continue.
-
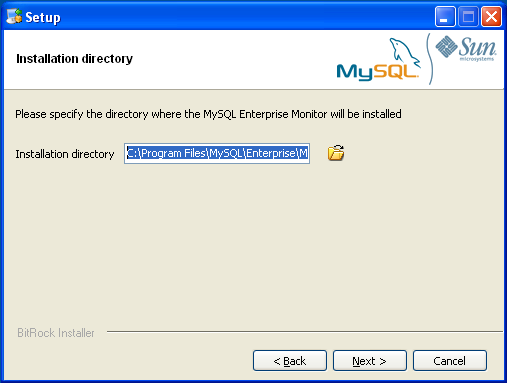
Select the installation directory where you want the MySQL Enterprise Service Manager components installed. By default on Windows the directory is
C:\Program
          Files\MySQL\Enterprise\Monitor
. You click the button next to the installation directory field to select a directory using the File chooser, or type the directory manually. Click Next to continue. -
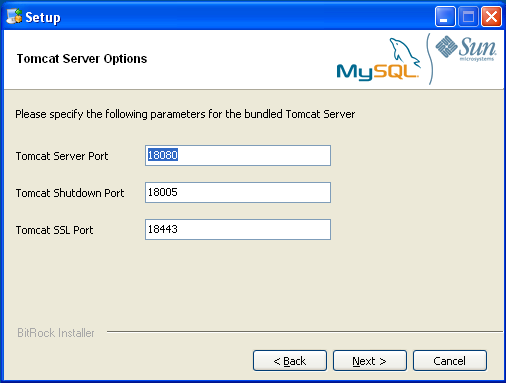
Configure the options that set the network ports used by the Tomcat server. For more information, see Section 15.3.2.1, “Service Manager Installation Common Parameters”. Click Next to continue.
-
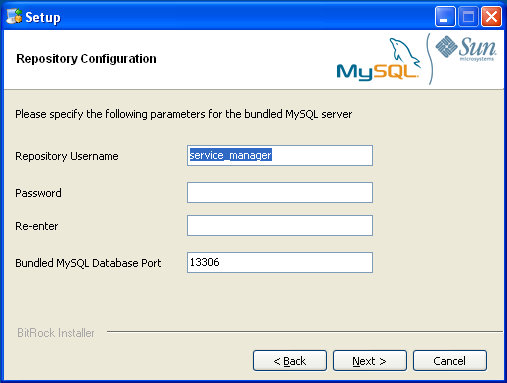
Configure the repository settings, setting the user name, password and port used to communicate with the bundled MySQL server that will be used to store the information and statistics for your installation. For more information, see Section 15.3.2.1, “Service Manager Installation Common Parameters”. Click Next to continue.
Note
If the Windows firewall is enabled you will be asked to unblock ports for Apache/Tomcat and the MySQL server.
You will be provided with information and a warning about the configuration options and how they are stored in the
configuration_report.txtfile, and it's location. Take a note of the full path to this file in case you need to look up the information later. Click Next to continue.You should now be prompted to start the installation process. Click Next to continue.
Once the installation has been completed, you will be provided with the information on how to uninstall MySQL Enterprise Service Manager. Click Next to continue.
To complete the installation and set up your MySQL Enterprise Service Manager, you will need to login to the Dashboard. You can do this automatically by checking the box on the final window before clicking Finish. This checkbox is selected by default. If you do not want to run the Dashboard at this time, uncheck the box and clock Finish.
For instructions on starting the MySQL Enterprise Monitor services under Windows, see Section 15.3.2.5, “Starting/Stopping the MySQL Enterprise Monitor Service on Windows”.


User Comments
Add your own comment.