- 20.2.3 Connector/NET Visual Studio Integration
- 20.2.3.1 Making a connection
- 20.2.3.2 Editing Tables
- 20.2.3.3 Editing Views
- 20.2.3.4 Editing Stored Procedures and Functions
- 20.2.3.5 Editing Triggers
- 20.2.3.6 Editing User Defined Functions (UDF)
- 20.2.3.7 Cloning Database Objects
- 20.2.3.8 Dropping Database Objects
- 20.2.3.9 Using the ADO.NET Entity Framework
- 20.2.3.10 MySQL Website Configuration Tool
[+/-]
Connector/NET 6.0 introduced support for the ADO.NET Entity Framework. ADO.NET Entity Framework was included with .NET Framework 3.5 Service Pack 1, and Visual Studio 2008 Service Pack 1. ADO.NET Entity Framework was released on 11th August 2008.
ADO.NET Entity Framework provides an Object Relational Mapping (ORM) service, mapping the relational database schema to objects. The ADO.NET Entity Framework defines several layers, these can be summarized as:
Logical - this layer defines the relational data and is defined by the Store Schema Definition Language (SSDL).
Conceptual - this layer defines the .NET classes and is defined by the Conceptual Schema Definition Language (CSDL)
Mapping - this layer defines the mapping from .NET classes to relational tables and associations, and is defined by Mapping Specification Language (MSL).
Connector/NET integrates with Visual Studio 2008 to provide a range of helpful tools to assist the developer.
A full treatment of ADO.NET Entity Framework is beyond the scope of this manual. You are encouraged to review the Microsoft ADO.NET Entity Framework documentation.
In this tutorial you will learn how to create a Windows Forms Data Source from an Entity in an Entity Data Model. This tutorial assumes that you have installed the World example database, which can be downloaded from the MySQL Documentation page. You can also find details on how to install the database on the same page. It will also be convenient for you to create a connection to the World database after it is installed. For instructions on how to do this see Section 20.2.3.1, “Making a connection”.
Creating a new Windows Forms application
The first step is to create a new Windows Forms application.
In Visual Studio, select File, New, Project from the main menu.
Choose the Windows Forms Application installed template. Click OK. The solution is created.
Adding an Entity Data Model
You will now add an Entity Data Model to your solution.
-
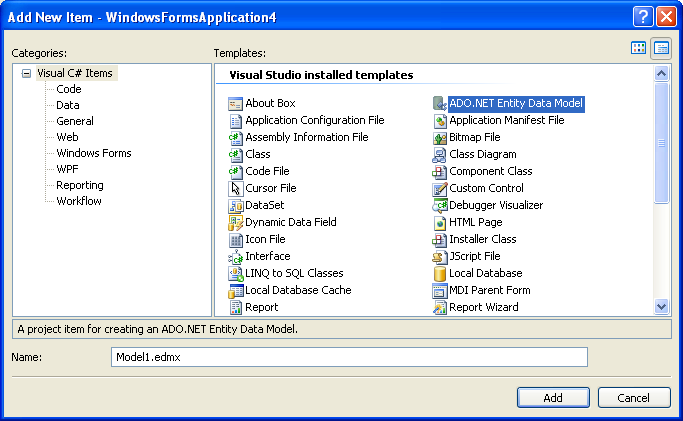
In the Solution Explorer, right click on your application and select Add, New Item.... From Visual Studio installed templates select ADO.NET Entity Data Model. Click Add.
-
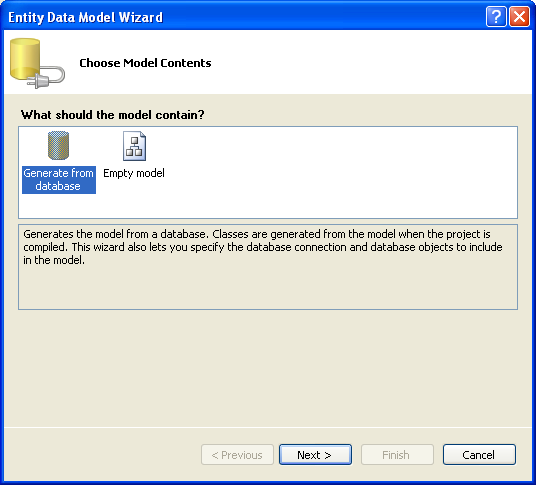
You will now see the Entity Data Model Wizard. You will use the wizard to generate the Entity Data Model from the world example database. Select the icon Generate from database. Click Next.
-
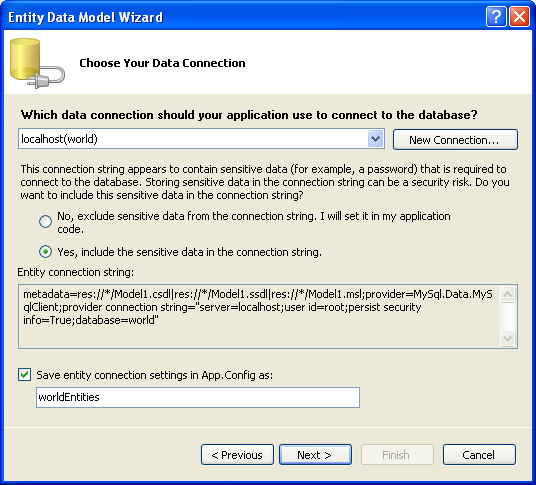
You can now select the connection you made earlier to the World database. If you have not already done so, you can create the new connection at this time by clicking on New Connection.... For further instructions on creating a connection to a database see Section 20.2.3.1, “Making a connection”.
Make a note of the entity connection settings to be used in App.Config, as these will be used later to write the necessary control code.
Click Next.
-
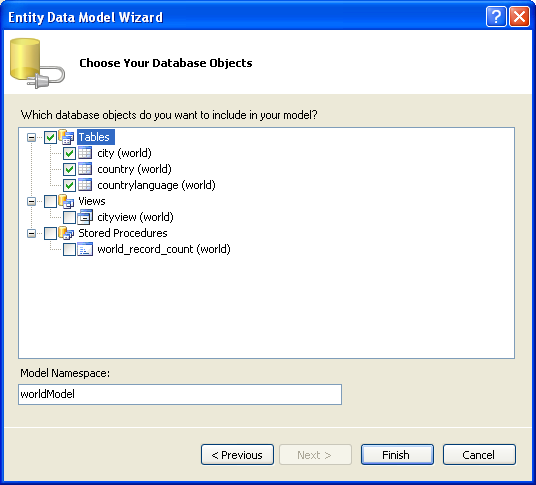
The Entity Data Model Wizard connects to the database. You are then presented with a tree structure of the database. From this you can select the object you would like to include in your model. If you had created Views and Stored Routines these will be displayed along with any tables. In this example you just need to select the tables. Click Finish to create the model and exit the wizard.
-
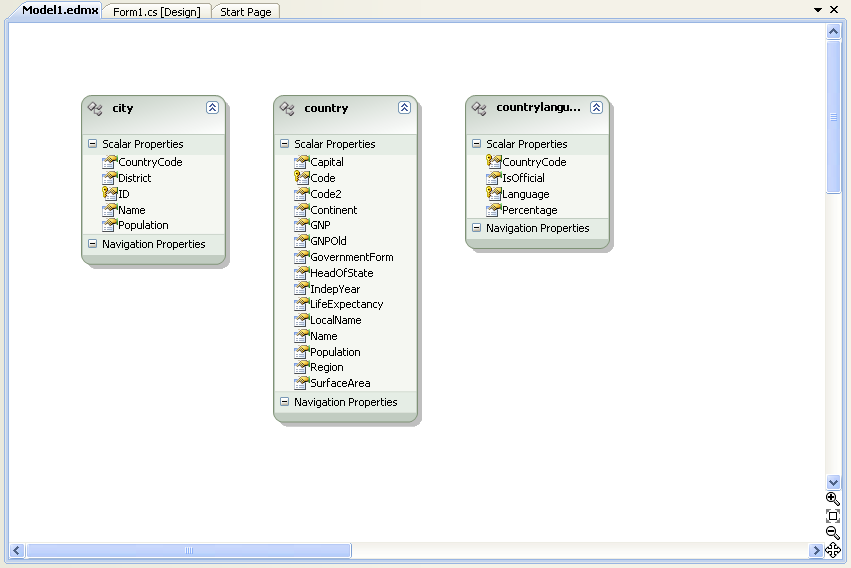
Visual Studio will generate the model and then display it.
From the Visual Studio main menu select Build, Build Solution, to ensure that everything compiles correctly so far.
Adding a new Data Source
You will now add a new Data Source to your project and see how it can be used to read and write to the database.
-
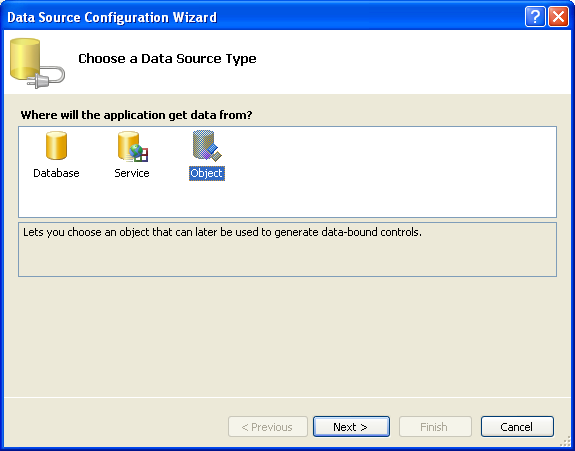
From the Visual Studio main menu select Data, Add New Data Source.... You will be presented with the Data Source Configuration Wizard.
Select the Object icon. Click Next.
-
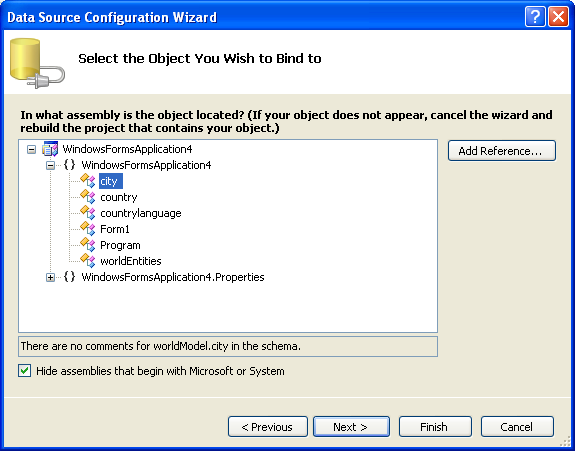
You will now select the Object you wish to bind to. Expand the tree. In this tutorial you will select the city table. Once the city table has been selected click Next.
-
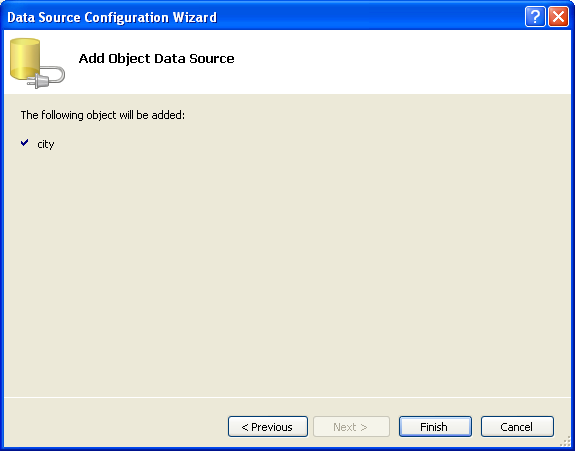
The wizard will confirm that the city object is to be added. Click Finish.
-
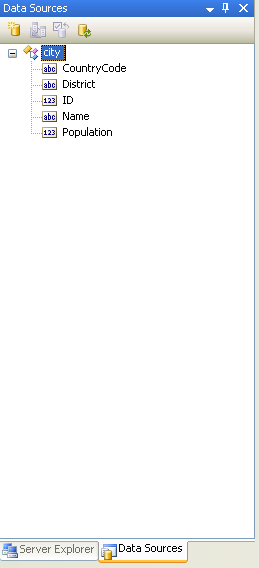
The city object will be display in the Data Sources panel. If the Data Sources panel is not displayed, select Data, Show Data Sources from the Visual Studio main menu. The docked panel will then be displayed.
Using the Data Source in a Windows Form
You will now learn how to use the Data Source in a Windows Form.
-
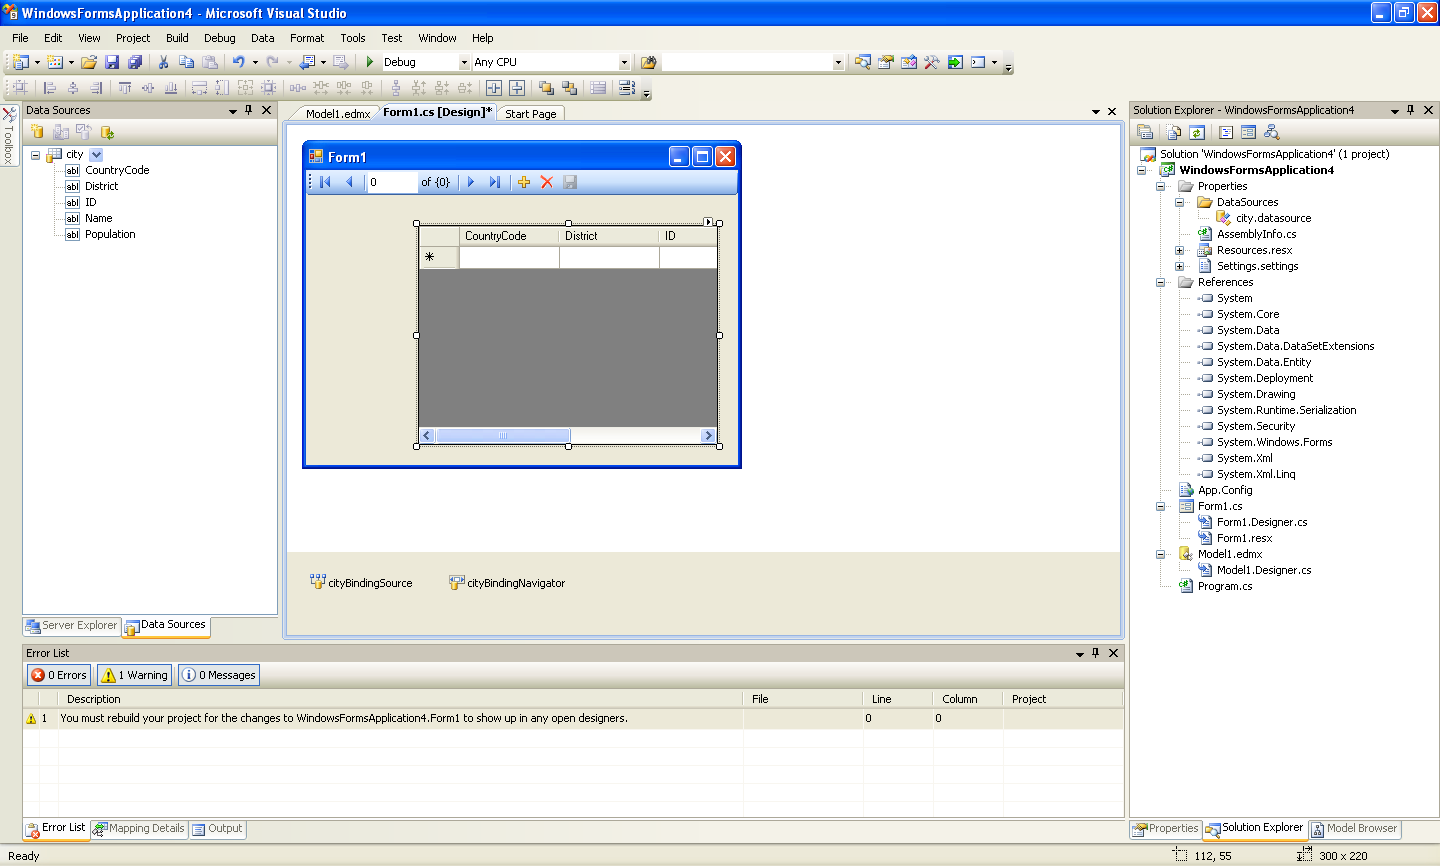
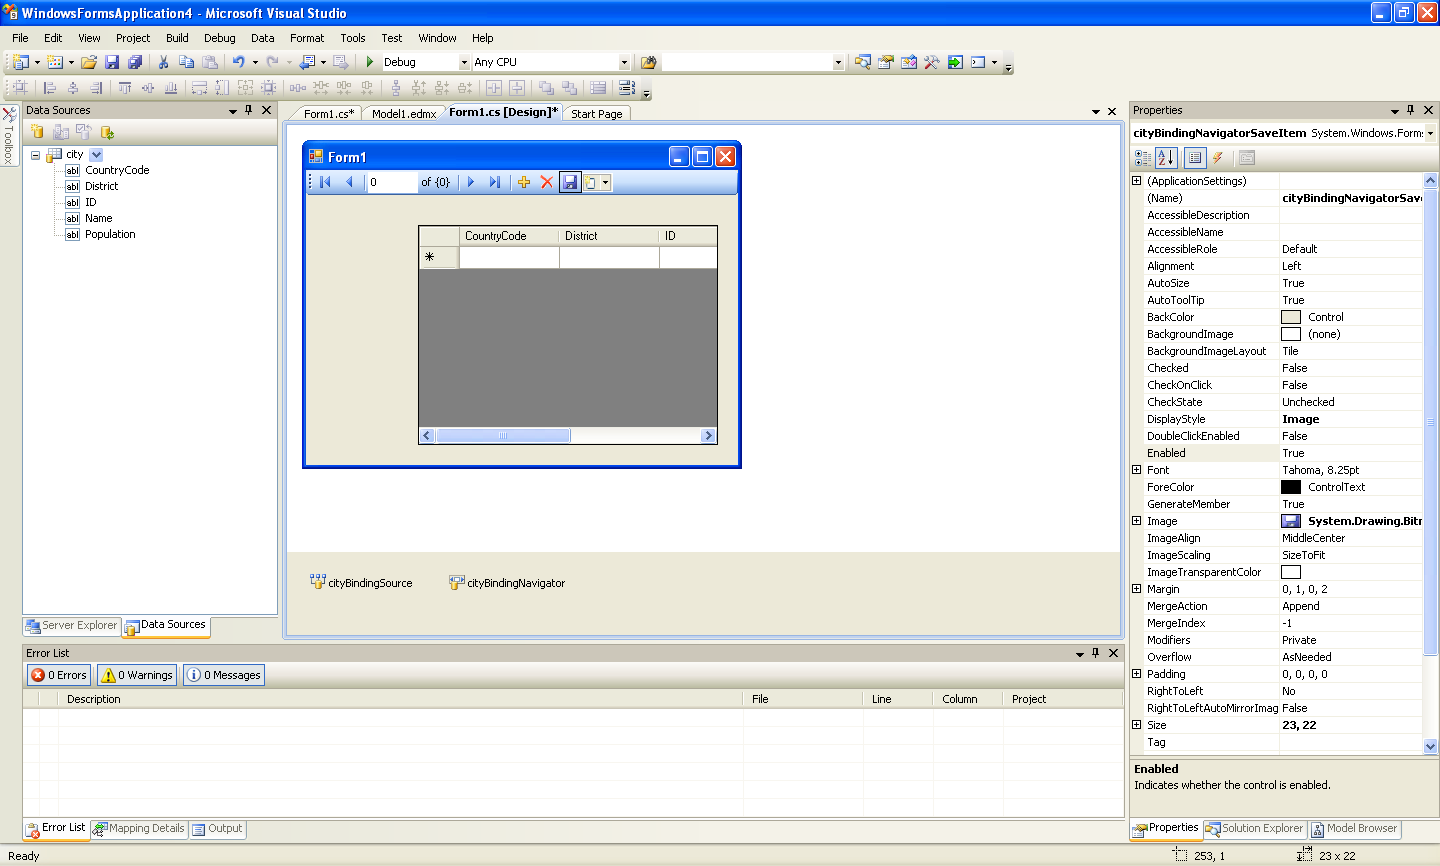
In the Data Sources panel select the Data Source you just created and drag and drop it onto the Form Designer. By default the Data Source object will be added as a Data Grid View control. Note that the Data Grid View control is bound to the
cityBindingSourceand the Navigator control is bound tocityBindingNavigator. Save and rebuild the solution before continuing.
Adding Code to Populate the Data Grid View
You are now ready to add code to ensure that the Data Grid View control will be populated with data from the City database table.
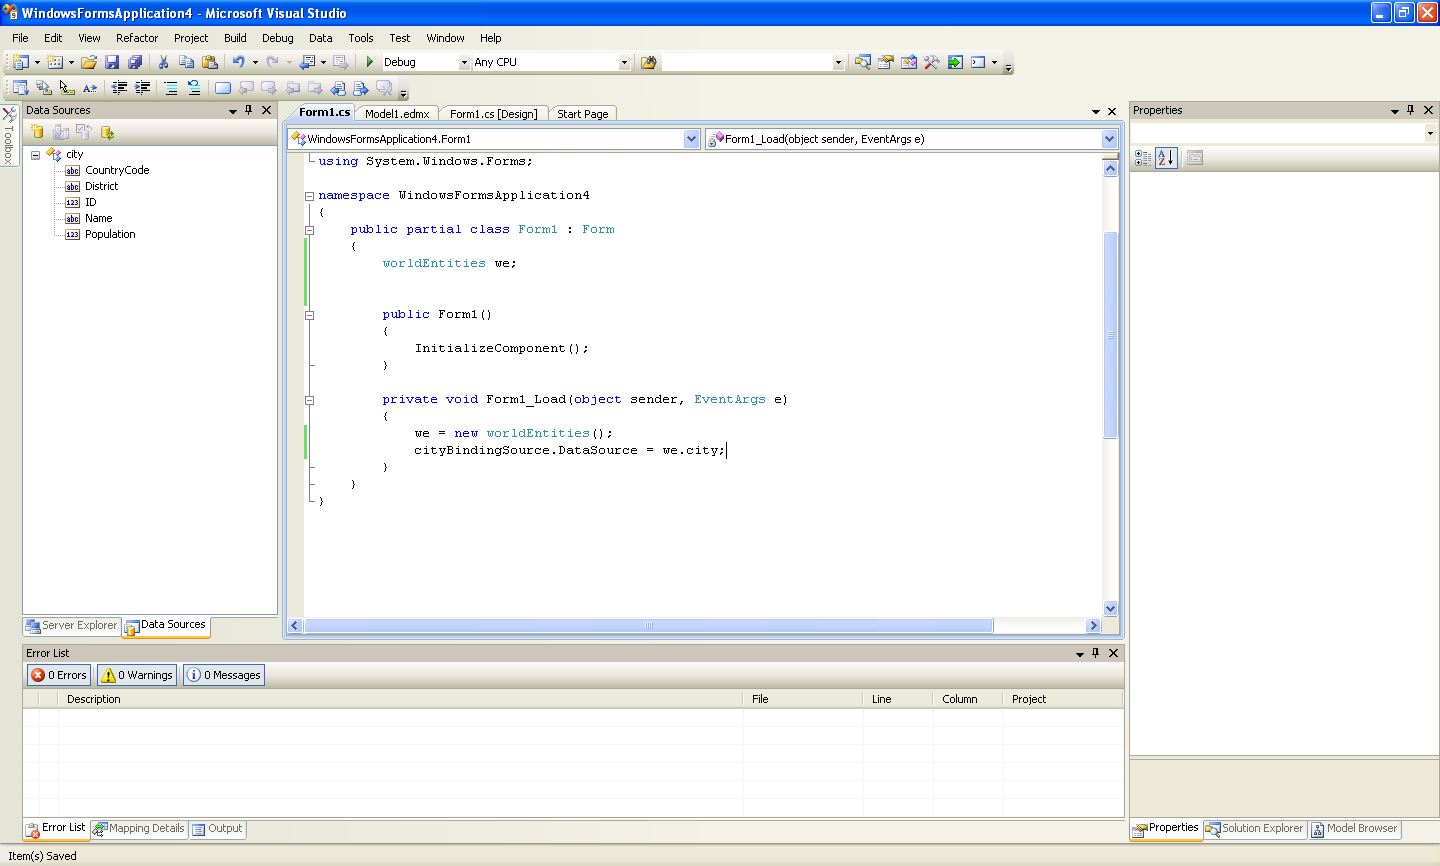
Double click the form to access its code.
-
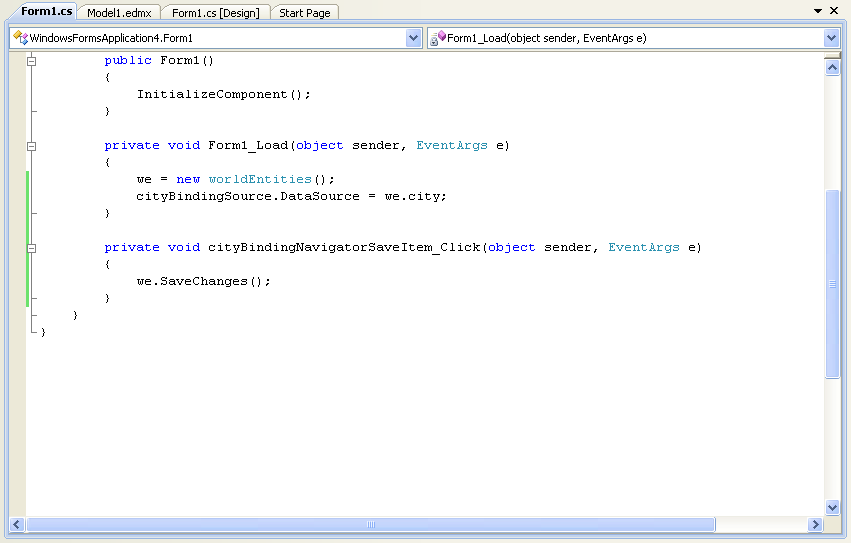
Add code to instatiate the Entity Data Model's EntityContainer object and retrieve data from the database to populate the control.
Save and rebuild the solution.
-
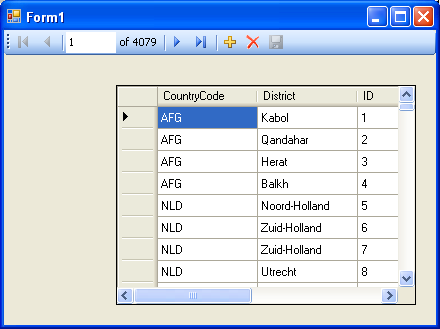
Run the solution. Ensure the grid is populated and you can navigate the database.
Adding Code to Save Changes to the Database
You will now add code to enable you to save changes to the database.
The Binding source component ensures that changes made in the Data Grid View control are also made to the Entity classes bound to it. However, that data needs to be saved back from the entities to the database itself. This can be achieved by the enabling of the Save button in the Navigator control, and the addition of some code.
-
In the Form Designer click on the Save icon in the Form toolbar and ensure that its Enabled property is set to True.
Double click the Save icon in the Form toolbar to display its code.
-
You now need to add code to ensure that data is saved to the database when the save button is click in the application.
Once the code has been added, save the solution and rebuild it. Run the application and verify that changes made in the grid are saved.
In this tutorial you create an ASP.NET web page that binds LINQ queries to entities using the Entity Framework mapping.
If you have not already done so, you should install the World example database prior to attempting this tutorial. Instructions on where to obtain the database and instructions on how to install it where given in the tutorial Section 20.2.3.9.1, “Tutorial: Using an Entity Framework Entity as a Windows Forms Data Source”.
Creating an ASP.NET web site
In this part of the tutorial you will create an ASP.NET web site. The web site will use the World database. The main web page will feature a drop down list from which you can select a country, data about that country's cities will then be displayed in a grid view control.
From the Visual Studio main menu select File, New, Web Site....
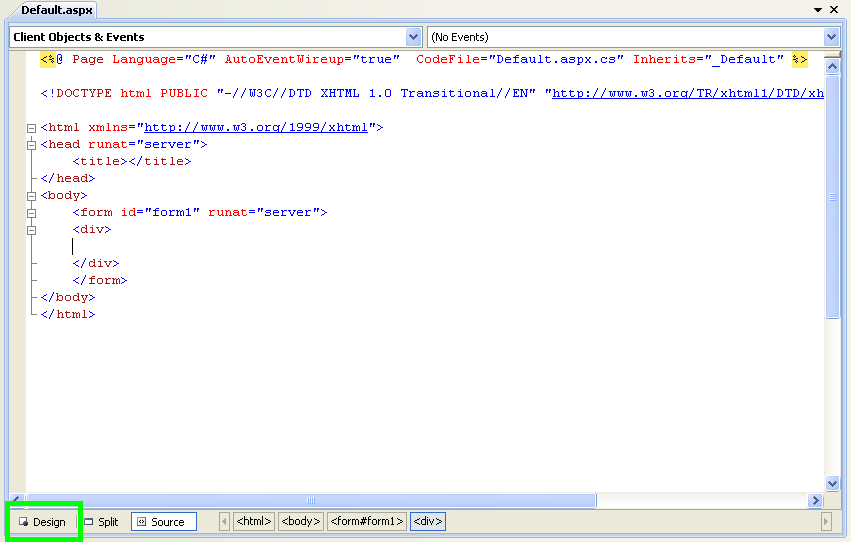
From the Visual Studio installed templates select ASP.NET Web Site. Click OK. You will be presented with the Source view of your web page by default.
-
Click the Design view tab situated underneath the Source view panel.
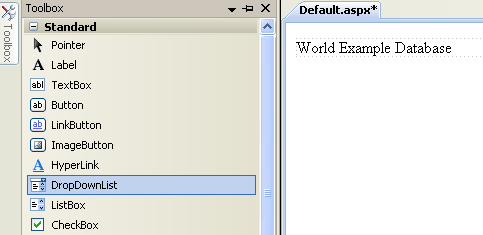
In the Design view panel, enter some text to decorate the blank web page.
-
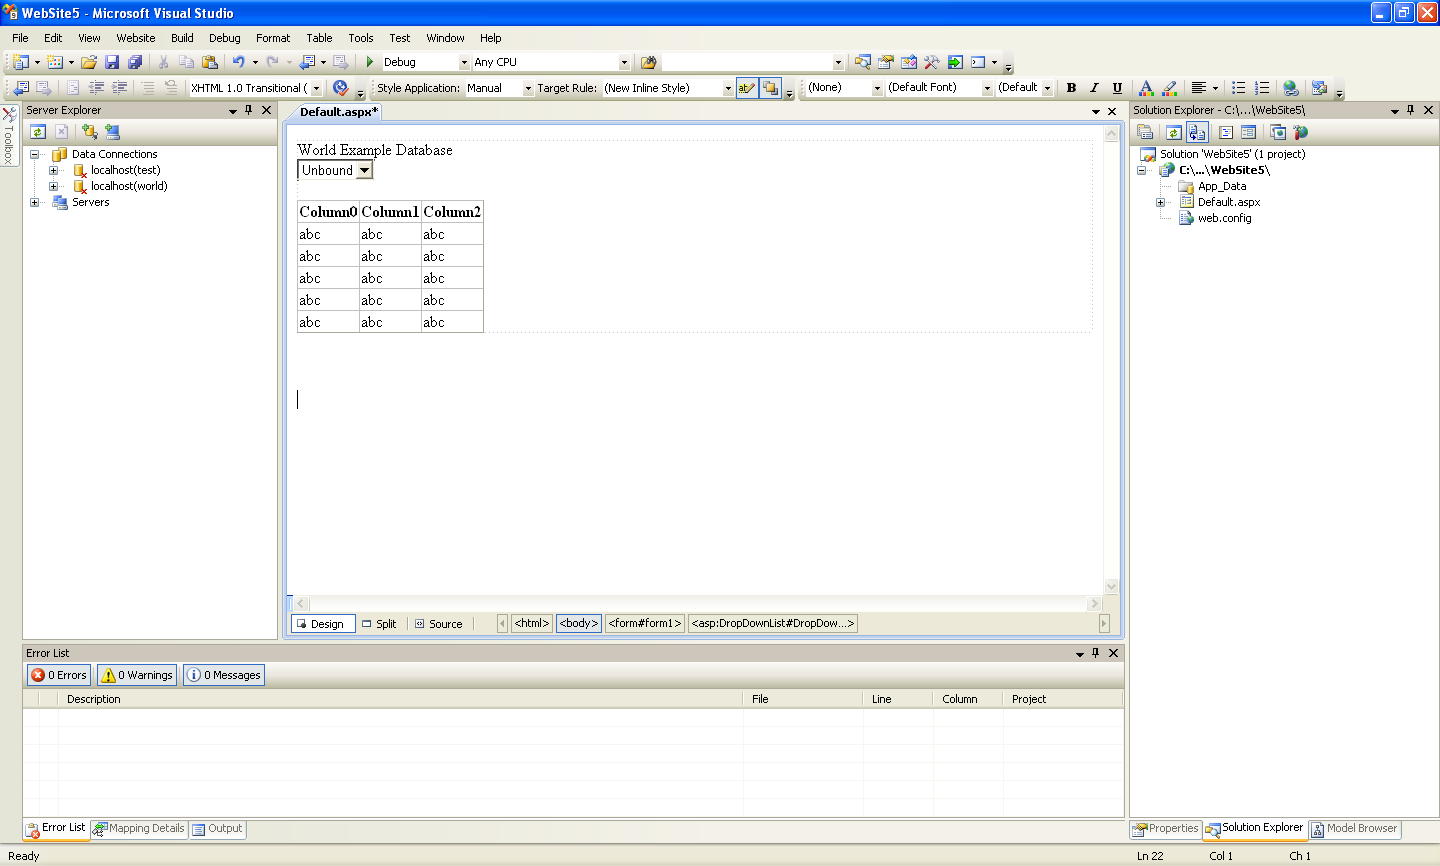
Click on Toolbox. From the list of controls select DropDownList. Drag and drop the control to a location beneath the text on your web page.
-
From the DropDownList control's context menu, ensure that the Enable AutoPostBack check box is enabled. This will ensure the control's event handler is called when an item is selected. The user's choice will in turn be used to populate the GridView control.
-
From the Toolbox select the GridView control.
Drag and drop the Grid Vew control to a location just below the Drop Down List you already placed.
At this point it is recommended that you save your solution, and build the solution to ensure that there are no errors.
If you run the solution you will see that the text and drop down list are displayed, but the list is empty. Also, the grid view does not appear at all. Adding this functionality is described in the following sections.
At this stage you have a web site that will build, but further functionality is required. The next step will be to use the Entity Framework to create a mapping from the World database into entities that you can control programmatically.
Creating an ADO.NET Entity Data Model
In this stage of the tutorial you will add an ADO.NET Entity Data Model to your project, using the World database at the storage level. The procedure for doing this is described in the tutorial Section 20.2.3.9.1, “Tutorial: Using an Entity Framework Entity as a Windows Forms Data Source”, and so will not be repeated here.
Populating a Drop Data List Box with using the results of a entity LINQ query
In this part of the tutorial you will write code to populate the DropDownList control. When the web page loads the data to populate the list will be achieved by using the results of a LINQ query on the model created previously.
In the Design view panel, double click on any blank area. This brings up the
Page_Loadmethod.-
Modify the relevant section of code according to the following listing:
...
public partial class _Default : System.Web.UI.Page
{
    worldModel.worldEntities we;

    protected void Page_Load(object sender, EventArgs e)
    {
        we = new worldModel.worldEntities();

        if (!IsPostBack)
        {
            var countryQuery = from c in we.country
                               orderby c.Name
                               select new { c.Code, c.Name };
            DropDownList1.DataValueField = "Code";
            DropDownList1.DataTextField = "Name";
            DropDownList1.DataSource = countryQuery;
            DataBind();
        }
    }
...
Note that the list control only needs to be populated when the page first loads. The conditional code ensures that if the page is subsequently reloaded, the list control is not repopulated, which would cause the user selection to be lost.
Save the solution, build it and run it. You should see the list control has been populated. You can select an item, but as yet the grid view control does not apear.
At this point you have a working Drop Down List control, populated by a LINQ query on your entity data model.
Populating a Grid View control using an entity LINQ query
In the last part of this tutorial you will populate the Grid View Control using a LINQ query on your entity data model.
In the Design view double click on the DropDownList control. This causes its
SelectedIndexChangedcode to be displayed. This method is called when a user selects an item in the list control and thus fires an AutoPostBack event.-
Modify the relevant section of code accordingly to the following listing:
...
    protected void DropDownList1_SelectedIndexChanged(object sender, EventArgs e)
    {
        var cityQuery = from c in we.city
                        where c.CountryCode == DropDownList1.SelectedValue
                        orderby c.Name
                        select new { c.Name, c.Population, c.CountryCode };
        GridView1.DataSource = cityQuery;
        DataBind();
    }
...
The grid view control is populated from the result of the LINQ query on the entity data model.
-
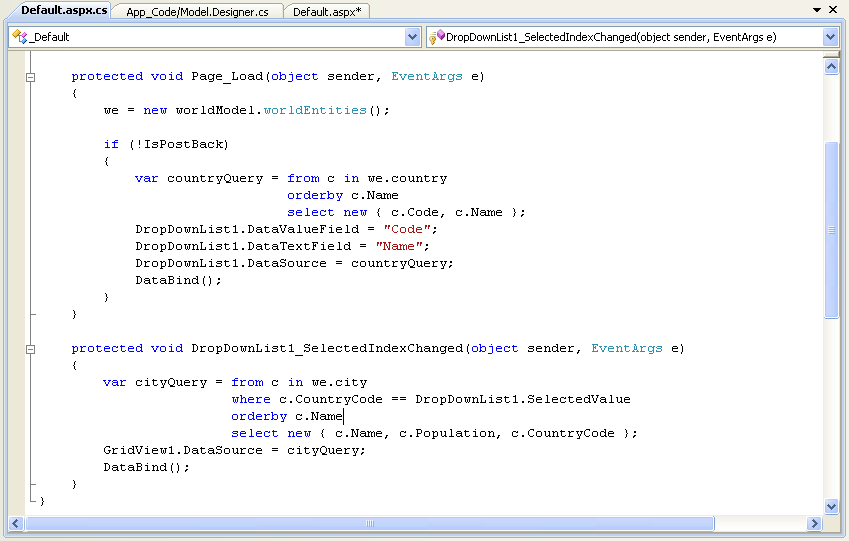
As a check compare your code to that shown in the following screenshot:
-
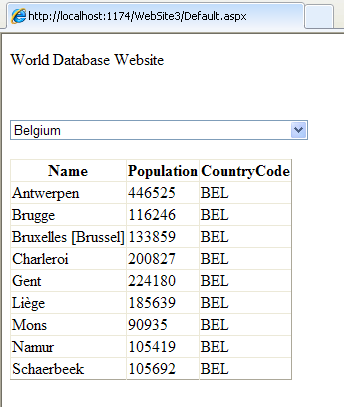
Save, build and run the solution. As you select a country you will see its cities are displayed in the grid view control.
In this tutorial you have seen how to create an ASP.NET web site, you have also seen how you can access a MySQL database via LINQ queries on an entity data model.



User Comments
The above example for adding a datasource works for website projects. However it does not work for web application projects. To add an entity data source for a web application project see this article: http://msdn.microsoft.com/en-us/library/bb896242.aspx
Add your own comment.