|
Paragraph Styles And Table Of Contents
Introduction To Styles
This tutorial is a short introduction to Styles. Paragraph Styles are used to add titles (Headings) above paragraphs. With Headings, a Table
Of Contents can be easily created.
In some cases, when this tutorial instructs you to select an item, the
item has already been selected/highlighted either by default or based on
selections you have already made in the tutorial.
Page Styles And Paragraph Styles
Page Styles determine how the overall page looks. Paragraph Styles determine
how different paragraphs within a page look.
When a New Text Document is opened, a Page Style and a Paragraph Style
are in effect. Both styles have the same name (Default) which can be confusing.
The Default Page Style
At the bottom of the screen there are the words “Page 1/1”
and “Default”. The word “Default” means the Page Style named “Default” is in effect. The words “Page 1/1” mean we are in the first page of a one
page document.
The Default Paragraph Style
The “Apply Styles” menu is located on the Formatting Toolbar
on the left and has the word “Default” in the dialog box. The word “Default”
in the dialog box means that the Paragraph Style named “Default”
is in effect within the Page Style named Default.
Open New Text Document And Save As
-
Click File > New > Text Document. (The  document appears.) document appears.)
-
Click File > Save As. In the Save in: pull-down menu box, click My Documents. In the Save as: type: dialog box, click the  and select OpenDocument Text (.odt). and select OpenDocument Text (.odt).
-
In the File name: box, type Lesson #1
-
Click Save.
Modify and Apply The Title Chapter Style
-
Type My Pets.
-
Click Format > Styles and Formatting. (The "Styles and Formatting" window appears.)
-
Click Automatic > Chapter Styles. (Click on the  in the menu box at the bottom of the Styles and Formatting window . Scroll to and select “Chapter Styles”. The "Chapter
Styles” window appears. You will see “Title” and “Subtitle”.
) in the menu box at the bottom of the Styles and Formatting window . Scroll to and select “Chapter Styles”. The "Chapter
Styles” window appears. You will see “Title” and “Subtitle”.
)
-
Right-click Title. A small menu appears. 
-
Click Modify. (The "Chapter Style: Title" window appears.)
-
Click the Alignment tab. In the Options section, click Center. (A dot appears before the word “Center”.) Click the Font tab. Click Arial (Font) > Bold ( Typeface) > 24 pt. (Size) > OK. (The “Size” may be specified in percent or in points. To change
from percent to points, delete the number in the upper “Size”
box and type a number followed by the letters, pt., such as 25pt. To change
from points to percent, delete the “Size” number and type a
number followed by the percent symbol such as 25%.)
-
Double-click Title. (The words, "My Pets", move to the center.)
Modify and Apply The Heading 1 Paragraph Style
-
Press Enter. Type My Cats.
-
Click Format > Styles and Formatting. (The "Styles and Formatting" window appears.)
-
Click Automatic > Text Styles. (Click on the in the menu box at the bottom of the Styles and Formatting window . Scroll to and select “Text Styles”.)
-
Click the Paragraphs Styles  icon. (The "Paragraph Styles" menu appears.) icon. (The "Paragraph Styles" menu appears.)
-
Right-click Heading 1. (A small menu appears.)
-
Click Modify. (The "Paragraph Style: Heading 1" window appears.)
-
Click the Alignment tab. In the Options section, click Center. (A dot appears before the word “Center”.) Click the Font tab. Click Arial (Font) > Bold ( Typeface) > 20 pt. (“Size”) > OK.
-
Double-click Heading 1. (The words, "My Cats", move to the center.)
Modify and Apply The “Heading 2” Paragraph Style
-
Type Garfield.
-
If you have closed the Styles and Formatting window, click Format > Styles and Formatting. (The "Styles and Formatting" window appears.) Click the Paragraph Styles icon. (The "Paragraph Styles" menu appears.)
-
Right-click Heading 2. (A small menu appears.)
-
Click Modify. (The "Paragraph Style: Heading 2" window appears.)
-
Click the Alignment tab. In the Options section, click Left. (A dot appears before the word “Left”). Click the Indent & Spacing tab. In the Indent section, in the Before text dialog box, type .50. Click the Font tab. Click Arial (Font) > Bold (Typeface) > 14 pt. (Size) Click OK.
-
Double-click Heading 2. (The word, "Garfield", is indented and is smaller.)
Create A Table Of Contents
-
Click after the title of the document, My Pets. (The flashing cursor, , appears just after the letter “s”.) , appears just after the letter “s”.)
-
Click Insert > Indexes & Tables > Indexes & Tables. (The “Insert Index/Table” window appears.)
- Select the Index/Table tab. In the Type dialog box , select Table Of Contents. Uncheck Protected against manual changes. Click OK. (The "Table of Contents" appear at the beginning of the document.)
Modify A Table Of Contents
See our tutorial “Create And Modify A Table Of Contents” for
information.
Close and Save "My Pets"
-
Click File > Close > Save. (When a file has been changed, you will see the message below.)
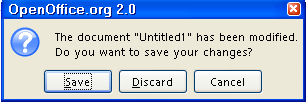
-
My Pets is saved.
NOTE
Tutorials are improved by input from users. We solicit your constructive
criticism.
Click here to E-mail your suggestions and comments
Edited by Sue Barron
Paragraph Styles And Table Of Contents 09/27/07
Last modified: 2008-04-30 01:42 UTC
  
|

