|
PAGE LAYOUT AND TEMPLATE
This tutorial explains the following settings for a page:
A template is created and saved. The template is used to make a new page
with the same page layout created at the beginning of this tutorial. This
saves time by not having to redo the page layout. Instructions for creating
a template are included.
Open A New Text Document
-
IF on the desktop, click  > All Programs > OpenOffice.org 2.2 > OpenOffice.org Writer. > All Programs > OpenOffice.org 2.2 > OpenOffice.org Writer.
-
IF you are in OpenOffice.org Writer, click File > New > Text Document.
-
In either case, the text document  appears on our screen. appears on our screen.
Turn Off The Word Completion Feature
-
Click Tools > AutoCorrect > Word Completion tab.
-
If there is a check-mark before “Enable word completion”, click “Enable word completion” (The check-mark is removed. Click OK.
-
If there is not a check-mark before “Enable word completion”, Click OK.
Paper Size
-
Click Format > Page. (The "Page Style: Default" window appears.)
-
Click on the Page tab. (The "Page" window appears.)
-
In the Paper format section in the Format menu, select the name of a paper size. To see the list of selections in
the “Format” menu, click on the  . (Users in the UK would select A4 which is the standard paper used in
the UK. This tutorial is being written for the USA standard paper size.) . (Users in the UK would select A4 which is the standard paper used in
the UK. This tutorial is being written for the USA standard paper size.)
-
Click Letter > OK. (The “Width” is set to 8.50 inches and the “Height” is set to 11.00 inches. The flashing cursor appears back on
the page.)
Margins
The flashing cursor,  , is where the two lines come together. The line to the left of the curser, , is where the two lines come together. The line to the left of the curser,
 , is the Left Margin and the line above the cursor, , is the Top Margin. The line on the right of your screen is the right margin. (There is a
bottom margin not seen on the screen.) , is the Left Margin and the line above the cursor, , is the Top Margin. The line on the right of your screen is the right margin. (There is a
bottom margin not seen on the screen.)
Words, numbers, and graphics can be placed anywhere on a sheet of paper
except for a small border at the four outer edges of the paper. The word
margin is used to describe the boundary lines where the borders end and the words
begin. All future added words, numbers, and graphics will stay within the
lines that indicate the margins. The margin lines appear on the screen
and will not appear on the printed page.
Change The Margins
-
Click Format > Page. (The "Page Style: Default" window appears.)
-
Click the Page tab.
-
In the “Left” dialog box under Margins, change the number in the dialog box to .50 by doing the following:
-
Move the pointer over the Left dialog box. The cursor changes from a pointer,  , to a cursor, . , to a cursor, .
-
Staying inside the Left dialog box, move the pointer all the way to the left (without changing the back into an ) .
-
Click. (Press the button on the mouse with the pointer finger.)
-
Press the Delete key enough times to delete everything in the “Left” dialog
box. Type .50
-
Two other methods to change the number in the dialog box is to highlight
the number, then type ".50" or to click on the to select ".50". (".50" is in the dialog box.)
-
In the Right dialog box and in the Top dialog box, change the number in the dialog box to .50 (Use the same method as used for the “Left” margin in step 3.)
-
Change the number in the Bottom dialog box to .55
-
Press the OK button.
-
The "Untitled1" text document appears on the screen with the margins reset. There is less
space outside the margins.
Footer
Click Insert > Footer > Default. The Footer appears at the bottom of the page with the flashing cursor, , in the Footer.
Page Numbering And Page Count
Add In The Footer
-
Click in the Footer. Type the word, Page, then press the Space bar. Click Insert > Fields > Page Number. (Page 1” appears in the Footer.)
-
To add page count, press the space bar, then type the word of, then press the space bar. Click Insert > Fields > Page Count. (Page 1 of 1 appears in the footer.)
- Click anywhere on the page. (The cursor appears on the page.)
Show Field Names Instead Of A Number
-
Click View (A menu appears).
-
If there is no check-mark before the words Field Names, numbers appear in the Footer.

-
If there is a check-mark by words Field Names, the name of the field such as Date (fixed) instead of the date 09/01/07 will appear in the Footer.

Activate The “Tips” Feature
When the Tips feature is activated and the cursor is placed over an Icon, the name of the icon will appear on the screen.
-
Click Tools > Options. If there is a + before the "OpenOffice.org", click on the +. (A menu appears directly below the words “OpenOffice.org.) Click
General. (The “Options – OpenOffice.org – General” window
appears.) Do either 2 or 3 below.
-
IF there is no check mark before the word “Tips”, click on the word Tips to place a check mark before the word "Tips". (The menu closes and the "Tips" feature is activated.)
-
IF there is a check mark before the word “Tips”, click the OK button. (The window closes and the cursor goes back to the document. The
"Tips" feature is activated.)
Create A Template
A template can be made with the same settings as the page made at the beginning
of this tutorial. The template can be used any number of times to open
a text file with the same settings.
-
Click File > Templates > Save. (The "Templates" window appears.)
-
In the New template dialog box, type Page Layout. (“Page Layout” is the name of the new template.)
-
Click My Templates under Categories if it has not been selected. (The blue background behind the words, “My
Templates”, indicates it has been chosen.)
-
Click OK. (The template is saved. The "Untitled1- OpenOffice.org Writer" text document still appears on the screen.)
-
Click File > Close. (You will get the message below.)
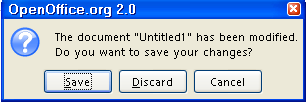
-
Click Discard. (The text file closes and it is not saved.)
Create A New Document From A Template
-
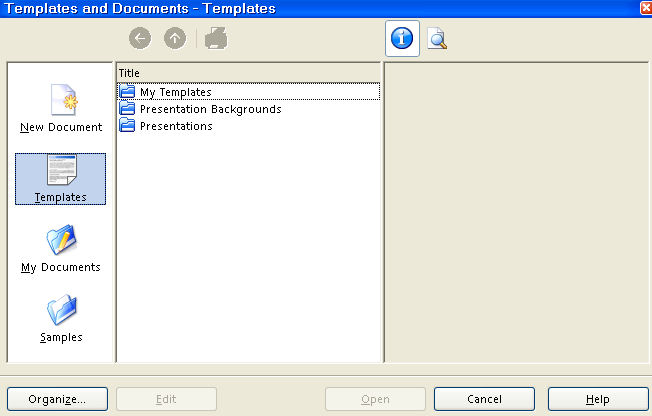
Click File > New > Templates and Documents. (The "Templates and Documents - Templates" window appears.)
-
Click on the Templates icon. (The background of the icon is blue.)
-
Under Title, double-click on the My Templates folder. (The files in the folder appear on the screen.)
-
Click on Page Layout. (Information about the template appears on the screen.)
-
Click the Open button. (The text document, Untitled1- OpenOffice.org Writer appears on the screen. )
-
The Untitled1- OpenOffice.org Writer file has the same settings that were created in this tutorial and can
be used as any normal text file.
NOTE
Tutorials are improved by input from users. We solicit your constructive
criticism.
Click here to E-mail your suggestions and comments
Edited by Sue Barron
Page Layout And Template 09/04/07
Last modified: 2008-04-30 01:42 UTC
   
|

