|
FIRST TIME USER - OpenOffice Writer
Writer is the word processing feature in OpenOffice. This tutorial explains
how to use the “Tips” feature, open a new text document, change
paper size, change margins, change the indentation of paragraphs, use icons,
Close and Open files, Undo entries, and get help.
Activate The “Tips” Feature
When the Tips feature is activated and the pointer is placed over an Icon, the name of the icon will appear on the screen.
-
Click Tools > Options. If there is a + before the "OpenOffice.org", click on the +. (A menu appears directly below the words “OpenOffice.org.) Click
General. (The “Options – OpenOffice.org – General” window
appears.) Do either 2 or 3 below.
-
IF there is no check mark before the word “Tips”, click on the word Tips to place a check mark before the word "Tips". Click the OK button (The window closes and the pointer goes back to the document. The
"Tips" feature is activated.)
-
IF there is a check mark before the word “Tips”, click the OK button. (The window closes and the pointer goes back to the document. The
"Tips" feature is activated.)
Open A New Text Document
-
IF on the desktop, click  > All Programs > OpenOffice.org 2.3 > OpenOffice.org Writer. > All Programs > OpenOffice.org 2.3 > OpenOffice.org Writer.
-
IF you are in OpenOffice.org Writer, click File > New > Text Document.
-
In either case, A text document appears on your screen. (The name of the
text document  appears at the top of the screen appears at the top of the screen
-
The next line down that starts with the word File is called the Menu Bar. (Clicking on a word in the Menu Bar shows a list of things that you can
choose to do in Writer. This list is called a Menu.)
-
The third line down is the Standard Toolbar. (Clicking on a small picture will make available a specific function
that can be done in Writer.)

-
The fourth line down is the Formatting Toolbar. (Additional specific functions that can be done in Writer are on this
line.)

-
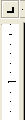
The fifth line down is the Ruler which appears on the top and the left side of the page. (Click “View”. If there is a check mark by Ruler, a ruler will appear at the top and the left side of your page on the
screen.) The Horizontal Ruler is below.

-
The numbers on the Ruler on the left side of the page indicate where the text is located on the
page from the top of the page. The numbers at the top of the page indicate
the location of the text from the left or right sides of the page.)
-
Right-click on the Ruler to see the choices for the settings which are Millimeter, Centimeter, Inch, Point, and Pica.
-
The Horizontal Scroll bar (by clicking and holding the pointer, you can navigate a document left
and right) is located at the bottom of the page above the Status Bar which is the line at the bottom of the screen that starts with Page 1/1. (This line gives you information about the document you are presently
using.)

-
The Vertical Scroll Bar (by clicking and holding the pointer, you can navigate up and down) is
located on the right side of your screen.

Paper Size
-
Click Format > Page > Page tab. (The “Page Style: Default” window appears)

-
For this tutorial we will use a paper size of 8 ½ by 11 inches which
is a common size in the USA. Under “Paper format”, in the “Format” pull-down menu, select Letter if it is not already selected. To use other paper sizes, open the “Format” pull-down menu and select a size of your choice.
-
Words, numbers, and graphics can be placed anywhere on a sheet of paper
except for a small border at the four outer edges of the paper. The word margin is used to describe the boundary lines where the borders end and the words begin. All future added words,
numbers, and graphics will stay within the lines that indicate the margins.
The margin lines appear on the screen and will not appear on the printed
page.
Change Margins
We will change the margins so there is 7 inches across the page instead
of 6 inches. To do this both the left margin and the right margin is reduced
from 1.25” to .75”.
-
In the “Page Style: Default” window, Click the Page tab if it is not already selected. Under “Margins”, In the
Left dialog box, change whatever number is there to 0.75”.
-
One way to get 0.75” is to click repeatedly on the  until .75 appears in the Left dialog box (The up-facing triangle increases the number and the down-facing
triangle decreases the number). until .75 appears in the Left dialog box (The up-facing triangle increases the number and the down-facing
triangle decreases the number).
-
Another way to get 0.75” is to type .75 (Click on the number that is there then type 75 then delete the original
number by pressing the Delete key)
-
In the Right dialog box, change the 1.25” to .75”, (This is done the same way that you changed the “Left” dialog
box)
-
Click the OK button. (The “Page Style: Default” window closes.)
Use The Ruler To Change The Indentation Of Selected Paragraphs
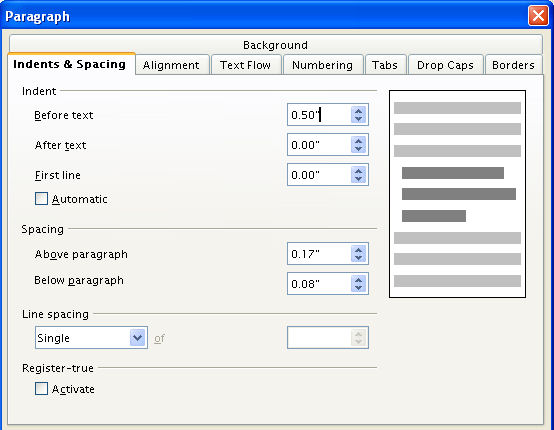
Indents are adjusted with the three small triangles on the horizontal ruler
or use the “Paragraph” window > “Indents & Spacing”
tab by double-clicking anywhere on the horizontal ruler.

-
To change the left or the right paragraph indent, highlight the paragraph(s) that you want to change the indent, drag the bottom left or the bottom right triangle on the horizontal ruler to a new location.
-
To change the first line indent of a selected paragraph, drag the top left triangle on the Horizontal Ruler to a new location.
-
You can adjust the indents by double-clicking anywhere on the Horizontal Ruler and adjust the indents in the Paragraph dialog. (The “Paragraph” window appears.)
Icons, Click, Right-click, Insert
-
The small pictures on the Standard Toolbar and some of the other toolbars are called icons. Click on each icon. (Click means to press and release the button on the left side of the mouse with
your index (pointer) finger. Click only one time unless instructed to “double- click”.)
-
Find the Gallery icon,  . Click on the Gallery icon. (The Gallery window appears on the screen. The background changes color when the icon
is in use. Some users may see a white background and some may see a blue
background.) . Click on the Gallery icon. (The Gallery window appears on the screen. The background changes color when the icon
is in use. Some users may see a white background and some may see a blue
background.)
-
Click on the Gallery icon again to close the window. (There is no background color on the “Gallery”
icon.)
-
Right-click anywhere on the printed or white page area of this tutorial. (Right-click means to press and release the button on the right side of the mouse with
your middle finger. Click only one time unless instructed to double-click.
A menu appears on the page. To close the window, click anywhere on the page other than on the menu.)
-
On the Menu Bar, click on Insert. (The “Insert” menu appears. This is a list of the various
things you can choose to do in Writer.)
Turn Off The Word Completion Feature
-
Click Tools > AutoCorrect > Word Completion tab. (The “AutoCorrect” window appears.)
-
Remove the check-mark in the box, if it is there, before the words Enable word completion. Click on the OK button.
Close And Open Files
-
On the Menu Bar, click on the word File. (A menu opens that has a list of words.)
-
Click on the words, Save As. (The “Save As” window appears.)
-
Click My Documents > File name: (If the words, "My Documents", are not already in the "Save
in:" dialog box, click the  at the right end of the “Save in:' dialog box. A menu will appear;
find “My Documents'” on this menu and click it. "My Documents" appears in the "Save in:" dialog box.
If the cursor is not flashing in the “File name:” dialog box
at the bottom of the “Save As:” window, move the I-beam pointer
into the box and click. The cursor is flashing in the “File name:”
dialog box.) at the right end of the “Save in:' dialog box. A menu will appear;
find “My Documents'” on this menu and click it. "My Documents" appears in the "Save in:" dialog box.
If the cursor is not flashing in the “File name:” dialog box
at the bottom of the “Save As:” window, move the I-beam pointer
into the box and click. The cursor is flashing in the “File name:”
dialog box.)
-
In the File name: dialog box, type the words, My Lesson. In the Save as type: pull-down menu box, click OpenDocument Text (.odt) if it is not already selected. Click on the Save button located to the right of the File name: dialog box. (The “My Lesson” file has been saved on your computer
in the folder, "My Documents", and can be opened later. The top
line on the screen has changed to . This indicates the file “My Lesson” is still open on your computer.) . This indicates the file “My Lesson” is still open on your computer.)
-
Click the word, File, again. Click the word, Close. (The “My Lesson” file is closed and is not seen on the screen.)
-
Click File > Open. (The “Open” window appears. If "My Documents" is
not already in the Look in: dialog box at the top of the "Open" window, in the list of directories
below the Look in: box, click "My Documents". The words, "My Documents",
appear in the "Look in:" dialog box.)
-
Click on My Lesson in the list below the Look in: dialog box. (The words, “My Lesson”, appear in the “File
name:” dialog box.)
-
Click the Open button which is to the right of the File name: dialog box. (The top line on the screen changes to and the first page of the file, “My Lesson”, appears on the
screen below the ruler.)
Undo Entries
Entries can be undone (can be deleted) in the reverse order in which the
entries were made. Word(s), graphic(s), and paragraph(s) can be deleted
and "Undo" can be used to put them back in your document. Type the three
paragraphs below.
This is the first paragraph.
This is the second paragraph.
This is the third paragraph.
Delete Word(s)
-
In the first paragraph, (This is the first paragraph.), highlight the word, first. Press the delete key. (The word, “first”, is deleted.)
-
Click Edit. (You will see the menu below.)
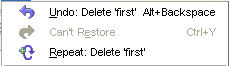
- Click on Undo: Delete 'first'. (The word, "first", that was deleted is placed back in the document and the menu will close.)
Delete One Paragraph
-
Highlight the first paragraph, This is the first paragraph. Press the Delete key to delete the paragraph. Click Edit. (When you delete one paragraph and you click Edit, you will see the menu below,
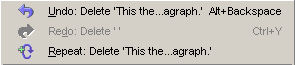
- Click Undo: Delete 'This is ...agraph.' (The paragraph, "This is the first paragraph" is placed back
in the document. The length of the sentences in the paragraph determines
how much of the paragraph is shown after the "Undo: Delete".)
Delete More Than One Paragraph
-
Highlight the three paragraphs (This is the first paragraph. This is the
second paragraph. This is the third paragraph.) at the beginning of the section, Undo Entries. Press the delete key to delete the paragraphs. (The three paragraphs are deleted.)
-
Click Edit. (You will see the menu below.)
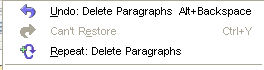
- Click on the Undo: Delete 'Paragraphs'. (The deleted paragraphs are placed back in the document.)
Delete Graphic(s)
-
Click on the image below. (The green handles will appear.)
-
Press the Delete key. (The graphic is no longer on your document.)
-
Click Edit. (You will see the menu below.)

-
Click Undo: Delete graphics Alt+Backspace. (The graphic reappears on the document.)
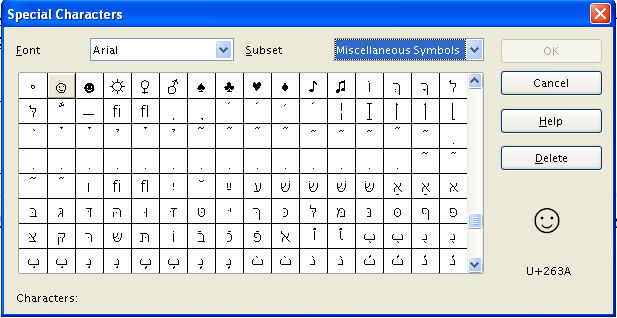
Insert Special Character
-
Place the pointer on the page and click where the symbol is to appear.
-
Click Insert > Special Character. (The "Special Characters" window appears. You will see two dialog boxes. The one on the left is
the "Font" menu and the one on the right is the “Subset” menu.)
-
In the Subset menu, click on the  until you see Miscellaneous Symbols. Click Miscellaneous Symbols. until you see Miscellaneous Symbols. Click Miscellaneous Symbols.
-
Scroll until you see the "☺" symbol. Click on the "☺" .
-
Click OK.
-
The ☺symbol appears on the page.
Getting Help
-
On the Menu Bar, click on the word Help. (A menu appears)
-
Click on the words, What's this?. (The mouse pointer becomes  ). ).
-
On the Standard Toolbar, move the pointer onto a picture (icon). (A brief description of what
the picture does appears on the screen)
-
On the Standard Toolbar and the Formatting Toolbar, move the pointer onto the icons to see what is there.
-
To get rid of the question mark, click anywhere on the screen below the
Standard Toolbar and the Formatting Toolbar.
NOTE
Tutorials are improved by input from users. We solicit your constructive
criticism.
Click here to E-mail your suggestions and comments
Edited by Sue Barron
First Time User OpenOffice Writer 11/04/07
Last modified: 2008.04.25 20:33 UTC
   
|

