|
Create A Tutorial
This tutorial has general background information about tutorials and some
information on standardization. Instructions on how to write a tutorial
are given.
-
Everyone is encouraged to email us tutorials EVEN IF A TUTORIAL IS FAR
FROM COMPLETE. A very difficult part of writing a tutorial is the initial
concept for the tutorial and then writing the first draft. Other people
are available to build upon your draft. The final draft will be given to
actual teachers and students who will find any bugs, if any.
-
One way to create a tutorial is to download a tutorial and modify that tutorial.
-
Most tutorials on this website are step-by-step instructions to do a specific
thing in OpenOffice. It is helpful to keep focused on the specific task
to be accomplished and add just the needed information. Do not add unneeded
information in an attempt to “educate” the student.
-
It is important that the tutorial has all the needed information. Just one missing piece of information may prevent the “student”
from understanding/completing the “lesson”.
-
See the tutorial “How To Use A Tutorial” for specific information
on how tutorials are used, how columns are used, and the purpose of putting words in bold.
Standardization
-
Standardization is preferred; however, any practical or usable design is
welcome.
-
Most tutorials are modular. Each section (block of information) has a heading (title) centered at the
top followed by paragraphs.
-
Any section can be copied and pasted into a tutorial you are writing.
- Use Bold to indicate the words that require an action or to call attention to the
words.
Examples Of Standardization
-
Bold is used so that certain words stand out; for example, words to be clicked
or to be typed are in bold.
-
This tutorial is written so that each section has a heading (title) centered
at the top and followed by paragraphs.
-
Parentheses ( ) enclose the explanatory information.
Steps In Writing A Tutorial
Copy A Tutorial From The Website
If you copy a tutorial, you might use the formatting that is already there
and even use some of the information.
Write A New Tutorial
Modify The Headings Of Paragraph Styles
The "Paragraph Style: Title" (Chapter Style) is meant to be the
title of the tutorial. The “Paragraph Style: Heading 1” is
used for the heading of sections. The “Paragraph Style: Heading 2”
and the “Paragraph Style: Heading 3” are used for the subheading
of sections that give information pertaining to the "Paragraph Style:
Heading 1 ."
Modify/Apply The "Paragraph Style: Title" (Chapter Style)
- Click File > New > Text Document. (The
 document appears.) document appears.)
- On the first line of the page, type the name of the tutorial and leave
the cursor on that first line.
-
Click Format > Styles and Formatting. (The "Styles and Formatting" window appears.)
-
Click on the  in the menu box at the bottom of the Styles and Formatting window . Scroll to and select Chapter Styles. (The "Chapter Styles” window appears. You will see “Title”
and “Subtitle”.) in the menu box at the bottom of the Styles and Formatting window . Scroll to and select Chapter Styles. (The "Chapter Styles” window appears. You will see “Title”
and “Subtitle”.)
-
Right-click Title. (A small menu appears 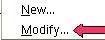 ) )
-
Click Modify. (The "Paragraph Style: "Title" window appears.)
-
Click the Alignment tab. In the Options section, click Center. (A dot appears before the word “Center”.)
-
Click the Font tab. If it is not already selected/highlighted, click Arial ("Font) > Bold (“Typeface”) > 16pt. (“Size”). (The “Size” may be specified in percent or in points.
To change from percent to points, delete the number in the upper “Size”
box and type a number followed by the letters, pt., such as 25pt. To change
from points to percent, delete the “Size” number and type a
number followed by the percent symbol such as 25%.) Click OK.
- In the Styles and Formatting window, double-click Title. (The title of your tutorial will move to the center of the line.)
Add Paragraphs
-
Press the Enter key twice. (When any "Chapter Style" with the word "Title" in its
name is activated and the "Enter" key is pressed, the cursor stays in the center of the page and the "Paragraph
Style: Subtitle" (Chapter Style) is activated. If you choose not to
use a "Subtitle", click "Enter" twice to activate the "Paragraph Style: Text body" and then the
cursor will move down two lines and the "Paragraph Style" named
"Text body" will be activated. The font name is “Arial”, the font size is 12 and
the Bold,  , icon no longer has a white background or another color depending upon
your settings and is not in use.) , icon no longer has a white background or another color depending upon
your settings and is not in use.)
-
Type the words, There are two methods to create a tutorial. One method is to copy the tutorial
from the website and modify it. Another method is to write the tutorial
following the steps given in this tutorial. (Because the Paragraph Style named “Text Body” was activated
when “Enter” was pressed twice, the font size is 12 and the
words are not in bold. The paragraph you just typed appears different than
the words, “My Tutorial”. The "Paragraph Style: Title" (Chapter Style) is in effect for
“My Tutorial” while the "Paragraph Style: Text body” is in effect for the paragraph you typed.)
-
Press the Enter key. (The cursor moves down two lines. The "Paragraph Style: Text body”
stays activated.)
-
Type the words, Two reasons for tutorials to be standardized are a module may be used in
another tutorial and instructions for the same task are presented in the
same manner in all the tutorials.
- Press the Enter key.
Modify/Apply The "Paragraph Style: Heading 1"
-
Press Enter.
-
Type the name of the section heading. For this lesson type the words, Section Heading.
-
In the Paragraph Styles window, right-click on Heading 1. (A small menu appears.)
-
Click Modify. (The “Paragraph Style: Heading 1” window appears.) Click the Alignment tab. In the Options section, click on the word Center.
-
Click the Font tab. In the menu box under Font, click Arial. In the menu box under Typeface, click Bold. In the menu box under Size, click 16pt. (The “Size” may be specified in percent or in points. To change
from percent to points, delete the number in the upper “Size”
box and type a number followed by the letters, pt., such as 25pt. To change
from points to percent, delete the “Size” number and type a
number followed by the percent symbol such as 25%.) Click Close.
- Double-click Heading 1. (The words, "Section Heading", moves to the center, become smaller,
and is darker. The "Paragraph Style: Heading 1” automatically
applies the font name, "Arial", the font size, "16",
and is in "Bold".)
Modify/Apply The "Paragraph Style: Heading 2"
-
Press Enter.
-
Type the name of the subheading. For this lesson, type the word, Subheading.
-
Right-click on Heading 2. (A small menu appears.)
-
Click Modify. (The “Paragraph Style: Heading 2” window appears.) Click the Alignment tab. In the Options section, click on the word Left.
-
Click the Font tab. In the menu box under Font, click Arial. In the menu box under Typeface, click Bold. In the menu box under Size, click 14pt. (The “Size” may be specified in percent or in points. To change
from percent to points, delete the number in the upper “Size”
box and type a number followed by the letters, pt., such as 25pt. To change
from points to percent, delete the “Size” number and type a
number followed by the percent symbol such as 25%.) Click Close.
-
Click the Indent & Spacing tab. In the Indent section, in the Before text dialog box, type .50. (Highlight the numbers and type ".50".) Click OK.
- Double-click Heading 2. (The word, "Subheading", becomes darker. The "Paragraph Style:
Heading 2” automatically applies the font name, "Arial",
the font size, "14pt", is indented ½ inch and is in "Bold".)
Modify/Apply The "Paragraph Style: Heading 3'
-
Type the name of the subheading. For this lesson type the words, Another Subheading.
-
Right-click on Heading 3. (A small menu appears.)
-
Click Modify. (The Paragraph Style: Heading 3 window appears.)
-
Click the Alignment tab. In the Options section, click Left.
-
Click the Font tab. In the menu box under Font, click Arial. In the menu box under Typeface, click Bold. In the menu box under Size, click 14pt. (The “Size” may be specified in percent or in points. To change
from percent to points, delete the number in the upper “Size”
box and type a number followed by the letters, pt., such as 25pt. To change
from points to percent, delete the “Size” number and type a
number followed by the percent symbol such as 25%.) Click Close.
-
Click the Indent & Spacing tab. In the Indent section, in the Before text dialog box, type 1.0. (Highlight the numbers and type "1.0".) Click OK.
- Double-click Heading 3. (The words, "Another Subheading", are in bold. The "Paragraph
Style: Heading 3” automatically applies the font name, "Arial",
the font size, "14", is indented 1 inch and is in "Bold".)
Paragraphs Under The Heading May Be Numbered Or Unnumbered
-
Highlight the paragraphs under each section.
-
Click on the Numbering On/Off,  , icon. (Numbers appear before the paragraphs under each heading.) , icon. (Numbers appear before the paragraphs under each heading.)
- When finished with the last paragraph under each Heading, place the cursor after the last word of the last paragraph and press
Enter. (The cursor will move down to a new paragraph. If a number appears, click
the “Numbering On/Off”, , icon to delete the number. To remove the numbers from the paragraphs,
highlight the paragraphs again and click the "Numbering On/Off",
, icon again.)
The Headings May Be Numbered Or Unnumbered
-
Click on the heading above, The Headings May Be Numbered Or Unnumbered.
- Click on the Numbering On/Off, icon. (Numbers appear before the headings of each section. To remove the
numbers from the headings, click on the "Numbering On/Off", , icon again.)
Insert A Table Of Contents And Add Hyperlinks
If you would like to do so, you may create a "Table of Contents"
and add "Hyperlinks".
Create A Table Of Contents
- After completing your tutorial, click on the last letter in the last word in the title which is the first line of the tutorial. (The flashing cursor appears just
after the last letter of the last word.)
- On the menu bar, click Insert. Click Indexes & Tables. In the menu, click Indexes & Tables. (The “Insert Index/Table” window appears.)
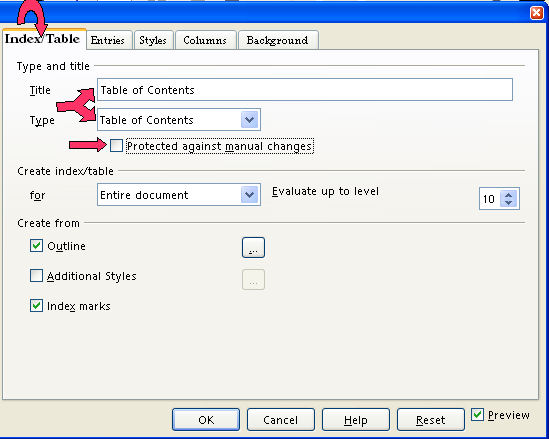
- Select the Index/Table tab, if it is not already selected. In the Type dialog box , select Table Of Contents, if it is not already selected. Uncheck Protected against manual changes. Click OK. (A Table of Contents appears at the beginning of your tutorial.)
Add Hyperlinks To The "Table Of Contents"
When a word(s) in the Table Of Contents is clicked, the cursor will go to where that information is found. For
example. The heading of this section, Add Hyperlinks To The "Table Of Contents", will be in the Table Of Contents of this tutorial. When the words, Add Hyperlinks to the Table Of Contents, are clicked, the cursor will go to this section on this page.
If You Have NOT Inserted A Table Of Contents
- Click after the last word in the title of the document. Select the Index/Table tab, if it is not already selected. In the Type dialog box , select Table Of Contents, if it is not already selected. Uncheck Protected against manual changes. Click OK. (The "Insert Index/Table" window appears.)
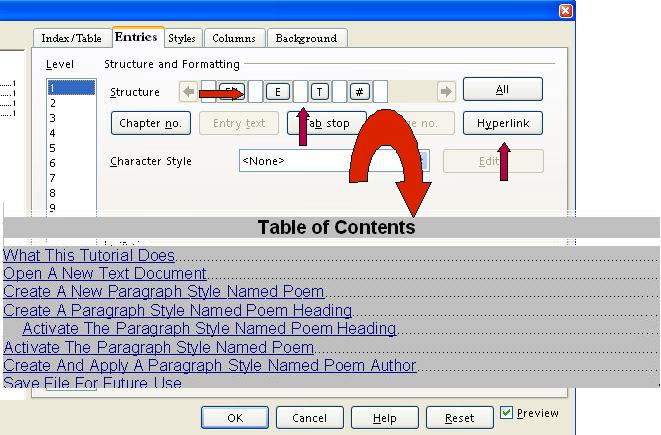
- To make the Hyperlinks, click the Entries tab of the window, click to the left of the E and click Hyperlink, and click after the E and click Hyperlink again. Click All. Click OK. (The "Table Of Contents" appears. All the headings are in "blue
and underlined" and are now "Hyperlinks". When you click
on them, you will be taken to that section.)
If You Have Already Inserted The "Table of Contents"
-
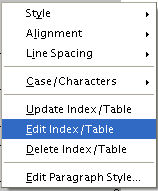
Place the pointer anywhere in the Table of Contents and right-click. (A menu will appear)
-
Click Edit Index/table. (The Insert Index/Table window appears.)
-
To make the Hyperlinks, click the Entries tab of the window, click to the left of the E and click Hyperlink, and click after the E and click Hyperlink again. Click All. Click OK.
-
After doing Step 2 , you will need to right-click in the Table of Contents. (A menu appears. Note: Be careful not to click any of the "Hyperlinked" text in the "Table of Contents". Clicking on a blank space between the text and the page numbers is usually
best.)
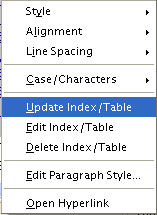
- Click Update Index/Table. (All the headings are in "blue and underlined" and are now "Hyperlinks".
When you click on them, you will be taken to that section.)
Insert A Footer
-
Click Insert > Footer > Default. (A footer appears at the bottom of the page.)
-
Type the name of your tutorial and the date or you can click Insert > Fields > Date. (The format will be mm/dd/yy.)
-
Type Page and press the Space bar.
-
Click Insert > Fields > Page Number. (The page number appears after “Page”.)
- If you prefer the Page Number of Page Count format, click Insert > Fields > Page Count. (“Page 1 of 1” appears on the first page of your document. As
you add pages, the pages are numbered and the number of pages after “of”
increases.)
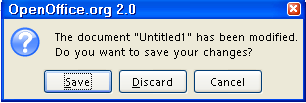
Close File
Click File > Close > Discard. (When a file has been changed, you will see the message below. The document
is no longer on the screen.)
NOTE
Tutorials are improved by input from users. We solicit your constructive
criticism.
Click here to E-mail your suggestions and comments
Edited by Sue Barron and George Hans
Create A Tutorial 11/23/06
Last modified: 2008.04.25 20:33 UTC
   
|

