|
Create A Template
What This Tutorial Does
You can create your own templates or you can use ready-made templates that are included in OpenOffice. This tutorial will explain the
various choices for "Paragraph Styles" to make your own templates
and how to make a new default template.
A template is used as the basis for creating other documents. Some of the
things that you can do with your template would be choosing between this
size or smaller letters, having pictures or not, and having one column or two column pages.
After making your choices, save the document as a template to use to create
a new document with the same styles. Templates can contain anything that
regular documents can contain such as text, graphics, and a set of styles.
Just about anything can be predetermined by a template.
Template Paragraph Styles
-
Click File > New > Templates and Documents > Templates. (The “Templates and Documents” window appears. There is a
list of templates you can use. The section on the left includes choices
of “New Document, Templates, My Documents and Samples”.)
-
Click New Document >Text Document > Open. (The  appears. appears.
-
Press Fll (a keyboard shortcut) or Format > Styles and Formatting. (The “Styles and Formatting” window appears.)
-
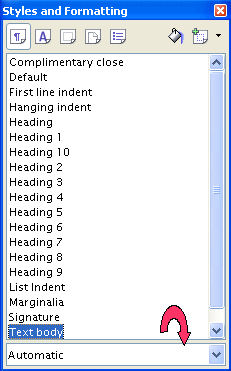
At the top of the Styles and Formatting window, click the Paragraph Styles,  , icon (the first icon on the left) (In the “Paragraph Styles”
window, there is a list of available “Paragraph Styles”. To
see a list of all the Paragraph Styles available, in the dialog box at the bottom of the "Styles and Formatting"
window, click the , icon (the first icon on the left) (In the “Paragraph Styles”
window, there is a list of available “Paragraph Styles”. To
see a list of all the Paragraph Styles available, in the dialog box at the bottom of the "Styles and Formatting"
window, click the  and scroll until you can select All Styles.) and scroll until you can select All Styles.)
-
At the top of the window, click on the Character Styles.  , icon. (A list of all “Character Styles” available in this
document appears.) , icon. (A list of all “Character Styles” available in this
document appears.)
-
Click on the page. Type This is a heading. (The cursor appears on the page to indicate where the typed characters will
appear.)
-
In Styles and Formatting, click on the Paragraph Styles, , icon and scroll so that you can see that there are 11 predefined headings:
"Heading, and Heading 1-10".
-
Double-click Heading 2. (The text you typed should be displayed in 14 point Arial font with bold
and italic. The alignment is “Left”.)
-
Double-click Heading 6. (Your text is now 10 point bold Arial. Note that the name of the "Style"
is displayed in the "Apply Style" dialog box on the "Formatting
Toolbar" (the third toolbar from the top of the screen.)
-
Right-click on Heading 6 in the Paragraph Styles window (A small window appears. 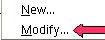
-
Select Modify. (The “Paragraph Style: Heading 6” window appears with twelve
tabs.)
-
If it's not already selected, click the Indents & Spacing tab . (Note that you have complete control over indentations and spacing between
lines.)
-
Click the Alignment tab. (The text for 'Heading 6” can be aligned to the left, right,
center or justified.)
-
Click the Font tab. (Use the drop-down menus to see what options are available in each
category by clicking on the to the right of each box. The “Size” may be specified in percent
or in points. To change from percent to points, delete the number in the
upper “Size” box and type a number followed by the letters,
pt., such as 25pt. To change from points to percent, delete the “Size”
number and type a number followed by the percent symbol such as 25%.)
-
Click the Font Effects tab. (Use the drop-down menus to see what options are available in each category
by clicking on the to the right of each box.)
-
Click the Position tab. (Here's how you can handle subscripts and superscripts (although not
usually used with a heading).
-
Click the Borders tab. (You can put a border around any text that has the style for which borders
are defined.)
-
Under Line Arrangement, click the icon to the far right.
-
Make the line, 1.00 pts, wide and select the color, Light Blue . (The window will change to reflect your choices.)
-
Click OK. (The heading in your text now has a thin light blue line at its left.)
-
Right-click Heading 6 and select Modify. Click the Background tab. (Use the drop-down menus to see what options are available in each
category by clicking on the to the right of each box. Note that the Background tab is used for setting
a background color or a graphic for the style.)
-
Click the Drop Caps tab. (Use the drop-down menus to see what options are available in each
category by clicking on the to the right of each box.)
-
Click the Tabs tab. (You can set where the cursor goes when you press the Tab key. Use
the drop-down menus to see what options are available in each category
by clicking on the to the right of each box.)
Text and Text Body Indent
-
Now let's add more text. Hit ENTER and then type this: In this tutorial you will learn the various choices you have when you create
your own template.
-
Double-click Text Body Indent in the Styles and Formatting menu. (The text you just typed has been indented 0.20 inches.)
-
Hit ENTER and type: After making your template, you may want to use it as the default template.
(The new text has picked up the style of the paragraph above it.)
-
Double-click Text. (The new text now has its own style with italics and is not indented.)
Save The Template
If you save your file at this point, it will contain not only what you
typed but also the original styles and the modified styles.
-
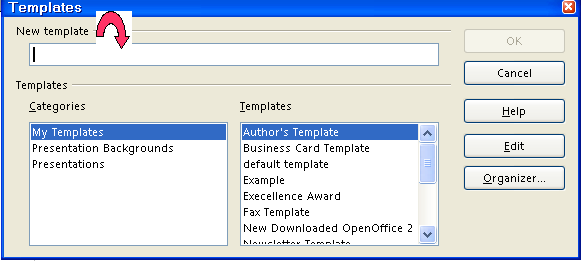
Click File > Templates > Save. (The “Templates” window appears.)
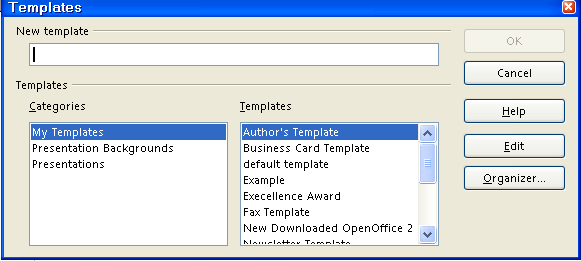
-
In the New template box, type a name for your template.
-
Under categories, click "My Templates" (if it is not already selected). Click OK.
-
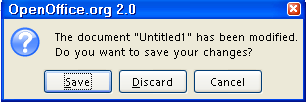
Click File > Close > Discard. (You will get the message below. Clicking "Discard" closes the document on the screen that you have saved as a
template, but the template itself may be found in the "My Templates"
folder and may be used again. appears at the top of the screen.)
How To Delete A Template
-
For templates saved in the My Documents folder: click File > Open > My Documents, (The "Open" window appears. In the "Files of type"
menu box, you will see "All files [*.*]". )
-
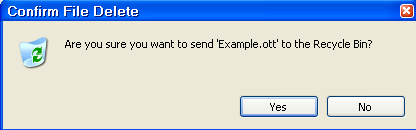
Right-click on the name of the template file that is to be deleted, Example, then click delete. (The "Confirm File Delete" popup window below appears. )
-
Click Yes.
-
For templates saved in the My Templates folder, click File > Templates > Organize. (The “Template Management” window appears.)
-
Double-click My Templates.
-
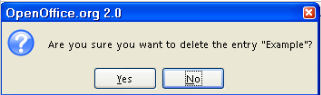
Click on the template that is to be deleted. Open the Commands pull-down menu. Click Delete. (The popup window below appears)
-
Click Yes.
-
Click Close. (The 'Template Management" window closes.)
How To Make Your Template The Default Template
You will want to save your preferences for the page layout to replace the
default template that was in effect when you first downloaded OpenOffice.
-
Create a document with the content, formatting styles, the font name and
the font size of your choice.
-
Click File > Templates > Save. (The Templates window appears.)
-
In the New template box, type a name for the new template.
-
Click Organizer. (The “Organizer” button is the last button on the right.)
-
Double-click on My Templates. (A list of the saved templates appears.)
-
Right-click on the template that you created and choose Set as Default Template.
-
Click Close. (The “Templates” window closes.)
-
When you click on File > New > Text Document, the choices you made in Step 1 will be in effect.
NOTE
Tutorials are improved by input from users. We solicit your constructive
criticism.
Click here to E-mail your suggestions and comments
Edited by Sue Barron and George Hans
Create A Template 11/18/06
Last modified: 2008.04.25 20:33 UTC
  
|

