|
Address Book
This tutorial explains how to use a spreadsheet to create an Address Book.
The Address Book is then used to print Address Labels.
Part 1 explains how to create an Address Book.
Part 2 explains how to Register the Address Book so it can be used as a Data
Source for printing labels.
Part 3 explains how to select information to be taken from the Address Book and
printed on the labels.
Part 4 explains how to print Address Labels using the Address Book as the Data
Source.
To save time, some Users may want skip Part 1 and download the Address Book that has already been made.
To download the Address Book, go to our website www.tutorialsforopenoffice.org
-
Under Our Tutorial Offerings, click on Writer.
-
On the Writer (word processing) Tutorials page, scroll down to ADDRESS BOOK, LABELS, ENVELOPES, FORM LETTERS - Chapter 6.
-
At Lesson 2 Address Book, click on the blue underlined here link.
-
Select Open with then click OK (The Address Book appears on your screen.)
-
Click File > Save As. In the Save in: pull-down menu box, select My Documents. Click the Save button.
If you already have your Data Source (your Address Book), you may want
to start at Part 2 and modify this tutorial as needed.
Part 1: Create An Address Book
-
IF in a OpenOffice 2.3 document, Click File > New > Spreadsheet. (A new spreadsheet appears on the screen that is named Untitled1 - OpenOffice.org Calc)
- IF not in a OpenOffice document, click
 > All Programs > OpenOffice.org 2.3 > OpenOffice.org Calc. (The name of the file Untitled1 - OpenOffice.org Calc appears on the screen) > All Programs > OpenOffice.org 2.3 > OpenOffice.org Calc. (The name of the file Untitled1 - OpenOffice.org Calc appears on the screen)
Change Column Width
-
Right-click on the A that is at the top of the first column. (A menu appears)
-
Click Column Width... (The “Column Width” window appears.)
-
In the Width dialog box, click on the top upward facing triangle of the  to select 1.19”. Click OK. to select 1.19”. Click OK.
-
Select both columns B and C. To do this, click on the B at the top of the second column and while holding down the button on your mouse, move the pointer over to
column C. (Both columns become highlighted) Release the click. Right-click on either B or C (A menu appears)
-
Click Column Width...
-
In the Width dialog box, use the  to select 1.49”. Click OK. to select 1.49”. Click OK.
-
Change the width of columns D and E to 0.99”.
- Change the width of column F to 0.59”. (Press the bottom downward facing triangle)
Add Titles To Columns
This tutorial suggests specific titles. At any time in the future, you
can change column titles, add or delete columns, and change column widths.
-
Click In cell A1 then type First Name.
- In cells B1 through F1 enter the following titles: Last Name - Street - City - State - Zip Code.
Center Titles
-
Select all the names by starting at cell A1 (The “First Name” column) and drag your mouse over all the names ending at cell F1 (The “Zip Code” column).
-
Click on the Centered  icon found on the Formatting Toolbar. (The titles of the columns are centered.) icon found on the Formatting Toolbar. (The titles of the columns are centered.)
Add The Addresses Of Three People
-
Click cell A2, then type the first name,William.
-
Click cell B2. (The cursor moves to cell B2.) Type the last name, Jones.
-
Click cell C2. (The cursor moves to C2.) Type the name of a street, 1 Main Street.
-
Add New York to cells D2.and E2.
-
Add 01111 to cell F2
- In row 3, enter Sam, Smith, 2 First Avenue, Chicago, Illinois, 54321 and in row 4, enter Ann, Baker, 3 East Drive, Denver, Colorado, 98765.
Format The Zip Code Column For Five Digits Zip Codes
-
Right-click on the F at the top of the Zip Code column. (The column is highlighted and a menu appears).
-
Click Format Cells (The 'Format Cells" window appears)
-
Click the Numbers tab.
-
Under Format, click General.
-
In the Leading zeros box, increase the number 1 to a 5.
-
Click OK. (A zero appears at the beginning of the "01111" zip code).
Create A Second Page
-
Click File > Page Preview. (A picture of page 1 appears on the screen.)
-
Click the Close Preview button. (Your address book appears back on the screen.)
-
There is a dark vertical line going down the page that probably is between columns G and H. That line is the edge of the printed page.

-
Select cells A1 through F1. (To do this, click in A1 then drag to cell F1.)
-
Right-click in any one of the selected cells, then click Copy. (The titles of the columns are copied to the clipboard.)
-
Scroll down until you see the dark horizontal line.
-
Click on the cell in column A that is on the row just below the dark horizontal line. Right-click then click Paste. (The titles of the columns are copied to the 1st row of the 2nd page.)
- On the 2nd row, type the following in the appropriate columns: Betty, Doe, 4 West Lane, Austin, Texas, 55555.
Save The Address Book
-
Click File > Save As. In the Save in: box, select My Documents.
-
In the File name: box, type Address_Book_Spreadsheet.
-
In the Save as type: box, select OpenDocument Spreadsheet (.ods).
-
Click the Save button.
Part 2: Register An Address Book As A Data Source
In Part 1 of this Tutorial, you created and saved the Address Book. You need to register the Address Book.
Open A New Text Document
-
IF on the desktop, click  > All Programs > OpenOffice.org 2.3 > OpenOffice.org Writer. > All Programs > OpenOffice.org 2.3 > OpenOffice.org Writer.
-
IF you are in Writer or Calc, click File > New > Text Document.
- In either case, the text document
 appears on our screen. appears on our screen.
Register An Address Book As A Data Source
-
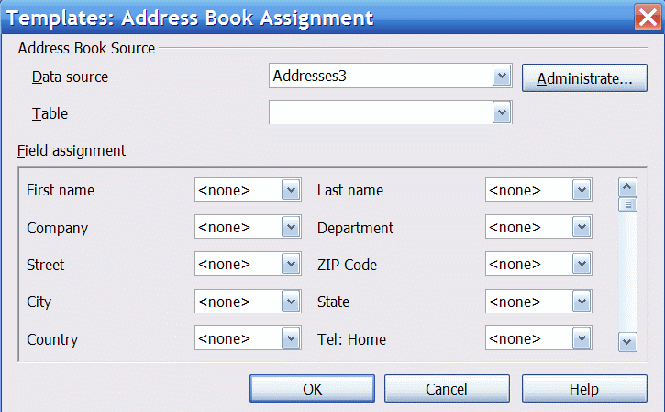
Click File > Templates > Address Book Source... (the “Templates: Address Book Assignment” window appears)

-
Click on the Administrate... button. (The “Address Book Data Source Wizard” window appears)
Select Other external data source. Click Next>.
-
Click the Settings button. (The “Create Address Data Source” window appears)
-
In the Database type pull-down menu, select Spreadsheet. Click Next>>. (The “Database properties – Connection settings” window
appears)
-
Click the Browse button. (The “Open” window appears) In the Look in: pull-down menu, select My Documents. Click on Address_Book_Spreadsheet. (The name appears in the “File name:” pull-down menu box)
Click on the Open button. (Under “Path to the spreadsheet document”, you will
see “C;\Documents and Settings . . .”
-
Press the Test Connection button. (A message appears, the connection was established successfully).
Click OK > Finish. (A window with “Field Assignment” appears)
-
Click the Field Assignments button. (The “Address Data – Field Assignment” window
reappears)
Part 3: Assign Fields
Select the Fields that will be printed on the labels.
-
The Address Data - Field Assignment window is on the screen.
-
In the First name pull-down menu box, select First Name.
-
In the Last name pull-down menu box, select Last Name.
-
For Street, select Street.
-
For Zip Code select Zip Code.
-
For City select City.
-
For State select State.
-
In the Data source, pull-down menu, there will be the word, Addressesand a number may also be there. Write down or remember what is there, you
will use Address later.
-
Click the OK button. (The words “Data Source Name” appears within the “Address
Book Data Source Wizard” window )
-
Click Finish button. (The  window appears.) window appears.)
Part 4: Print Address Labels
-
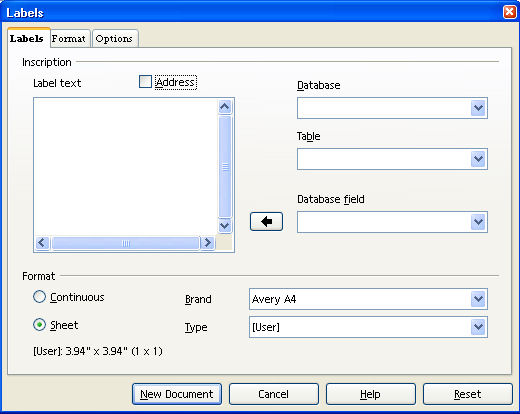
Click File > New > Labels. (The “Labels” window appears.)
-
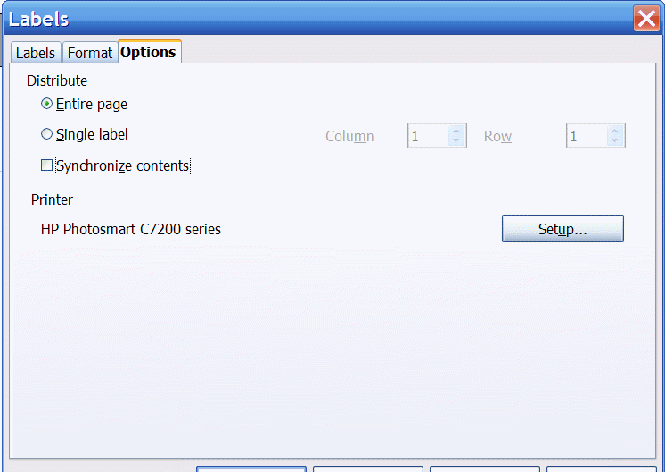
Click on the Options tab.

-
If there is a check mark in the small box before Synchronize contents, click on the check mark to remove the check mark.
-
Click on the Labels tab.

-
In the Database pull-down menu, select Addresses. (There may be a number with the Addresses depending upon what you did previously in Part 2.)
-
In the Table pull-down menu, select Sheet1.
-
In the Brand pull-down menu, select Avery Letter Size.
-
In the Type pull-down menu, select 5260 Address.
-
In the Database field pull-down menu, select First Name then Click on  (“<Addresses.Sheet1.0.First Name>” appears in the “Label
text” box.) (“<Addresses.Sheet1.0.First Name>” appears in the “Label
text” box.)
-
In the Database field pull-down menu, select Last Name then Click on  (“<Addresses.Sheet1.0.Last Name>” appears on the same
line as the “First Name”) In the Label text box, click on the next line below what you just added to the box. (“<Addresses.Sheet1.0.Last Name>” appears on the same
line as the “First Name”) In the Label text box, click on the next line below what you just added to the box.
-
In the Database field pull-down menu, select Street then Click on  (“<Addresses.Sheet1.0.Street>” appears in the “Label
text” box on the 2nd line.) (“<Addresses.Sheet1.0.Street>” appears in the “Label
text” box on the 2nd line.)
-
Place City, State, and Zip Code into the label text box.
-
Click New Document. (The “Labels – OpenOffice.org Writer” window appears)
-
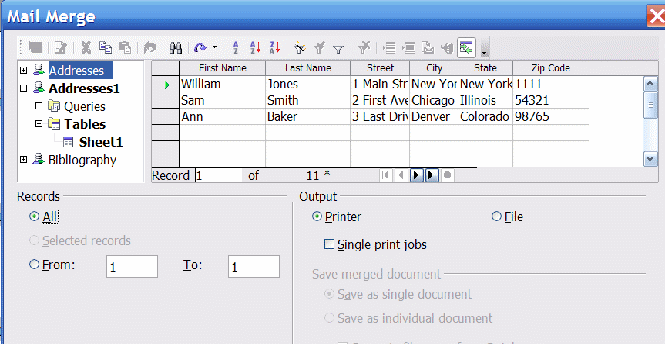
Click File > Print. Click Yes to Your document contains address database fields. Do you want to print a
form letter? (The “Mail Merge” window appears)

-
Click Tools > Mail Merge Wizard. Select. Use the current document. Click on 8. Saver, print, or send. Click Save the Document. (The “Save As” window appears)
-
Save in My Documents folder with the name My Address Labels. Click Finish button.
-
Click OK. Print the labels.
NOTE
Tutorials are improved by input from users. We solicit your constructive
criticism.
Click here to E-mail your suggestions and comments
Edited by Sue Barron
Address_Book 12/29/07
Last modified: 2008.04.25 20:33 UTC
   
|


